
How to Monitor a Raydium Liquidity Pool
In traditional finance, buyers and sellers provide liquidity for an asset through a centralized market. Decentralized finance (DeFi) uses liquidity pools instead. Liquidity pools are smart contracts that allow users to buy and sell crypto on decentralized exchanges and other DeFi platforms. By monitoring liquidity pools, you can track the performance of a given asset and make informed decisions about when to buy, sell, or swap. Monitoring the creation of new liquidity pools can also help you discover recently launched tokens.
This article will teach two approaches to monitor liquidity pools: webhooks and websockets. We will also learn how to set up a webhook and websocket to listen to events happening in a liquidity pool. Before diving into how the platform works, you'll need a Helius API Key. Obtaining one is simple through the Helius Dashboard. Sign up using your GitHub, Solana Wallet, or Google account, and navigate to the API Keys section in the left sidebar.
Via Webhook
To build via webhook, we need to follow three high-level steps. First, we will set up a Cloudflare Worker. Second, we will set up a Helius webhook and add the Cloudflare Worker's URL. The webhook will trigger the worker every time a transaction in the liquidity pool is listened to. Lastly, we will edit the worker's code to handle this notification and log the response.
Setup Cloudflare Worker
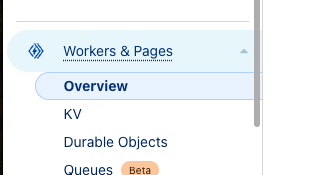
We will set up a worker that gets triggered by our webhook. We will add code to the worker to handle the trigger received from our webhook. Cloudflare Workers, let us deploy serverless code. Log in or sign up to Cloudflare’s website and select Workers & Pages from the left panel on the main page.
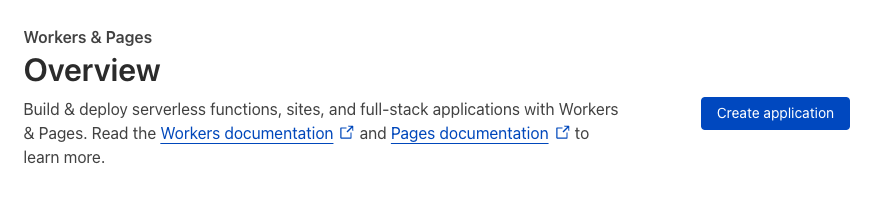
Click on the Create application button.
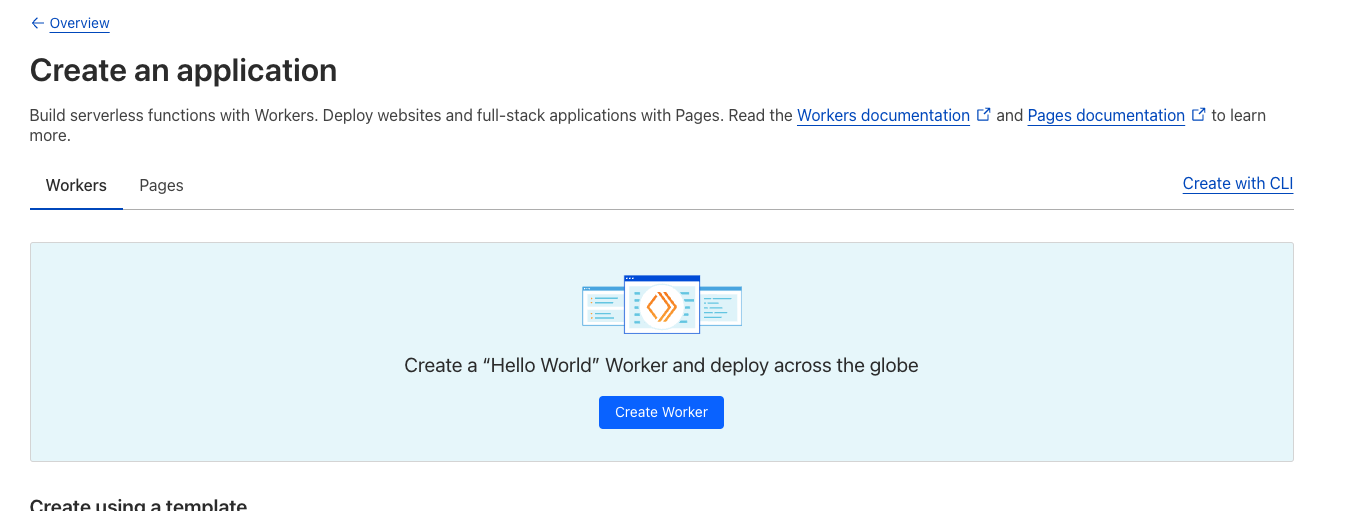
Next, click on Create Worker.
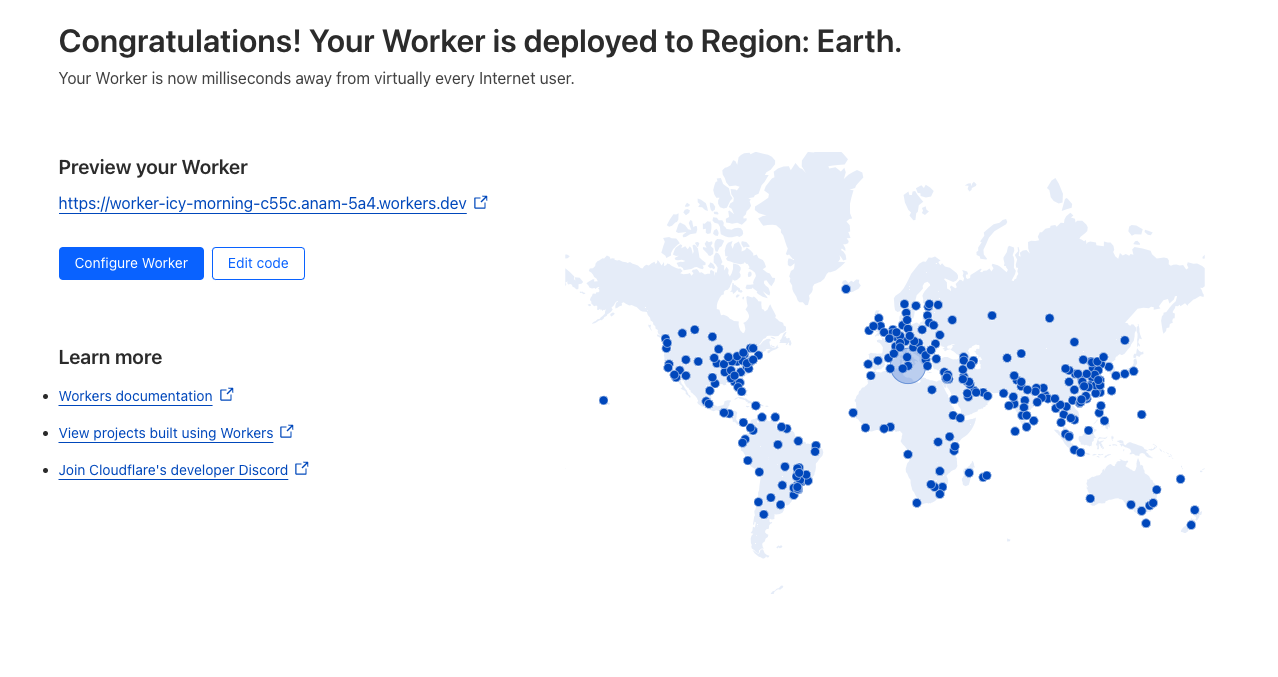
Now, hit Deploy.
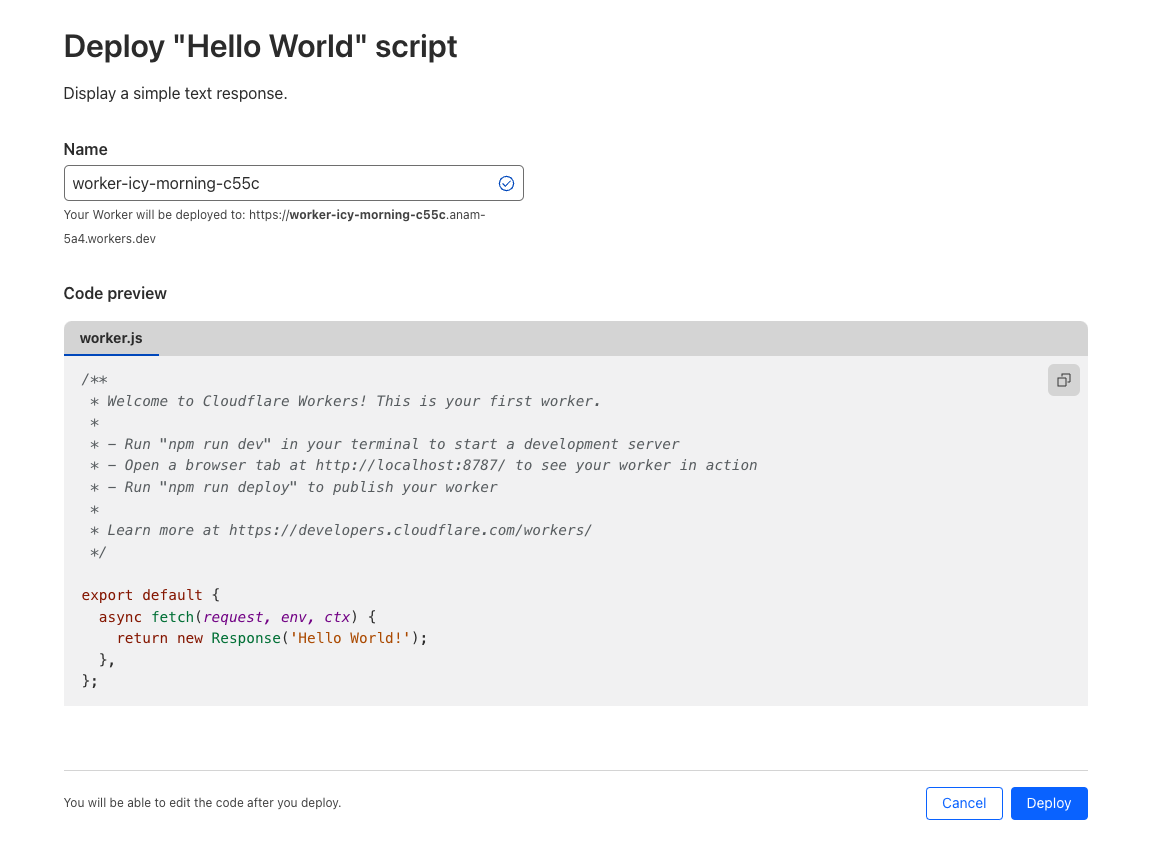
The worker has been deployed successfully. Please copy the worker link, as it will be used to set up our webhook.
Set Up the Webhook
We will monitor Raydium, the first AMM built on Solana to leverage a fully decentralized central limit order book. A central limit order book is an exchange-style execution method standard in the equity world that matches all bids and offers according to price and time priority. A decentralized central limit order book (CLOB) is an exchange system that operates on a distributed network of nodes rather than a central entity.
We will create a webhook using Helius. Webhooks allow you to listen to on-chain events and trigger specific actions when these events occur. We will configure the webhook to listen to specific transaction types in a given Raydium liquidity pool. Helius currently supports the following transaction types for Raydium:
"RAYDIUM": [
   "WITHDRAW_LIQUIDITY"
   "ADD_LIQUIDITY"
   "CREATE_POOL"
   "SWAP"
 ]
Webhooks can be created using the Helius Dashboard or the API reference. To create one via the Dashboard, go to the Webhooks section in the left panel and click New Webhook. Then, configure the webhook by providing details such as:
- Network: Mainnet/Devnet
- Webhook Type: To get the desired data, choose between the Enhanced, Raw, or Discord webhook types. If you want human-readable data, go for Enhanced; we will select this one. But if you prefer Discord, you must submit the Webhook URL, and the bot will format and send notifications directly. For assistance, refer to this article to learn how to set up a webhook for a Discord Bot. If you choose Raw, please note that you won't be able to specify the transaction type.
- Transaction Type: Select the transaction types shown in the below image. You can find other transaction types supported by a Program here.
- Webhook URL: Add the URL of the worker that we set up on Cloudflare (If you selected Discord, then you need to provide the Webhook URL for the bot)
- Authentication Header: Enter an authentication header to pass into the POST requests for your webhook. Note that this is optional.
- Account Address: Raydium’s AMM Program Address is here: 675kPX9MHTjS2zt1qfr1NYHuzeLXfQM9H24wFSUt1Mp8. You can also add more than one account address if required. You can also include the address of your assets to monitor them.
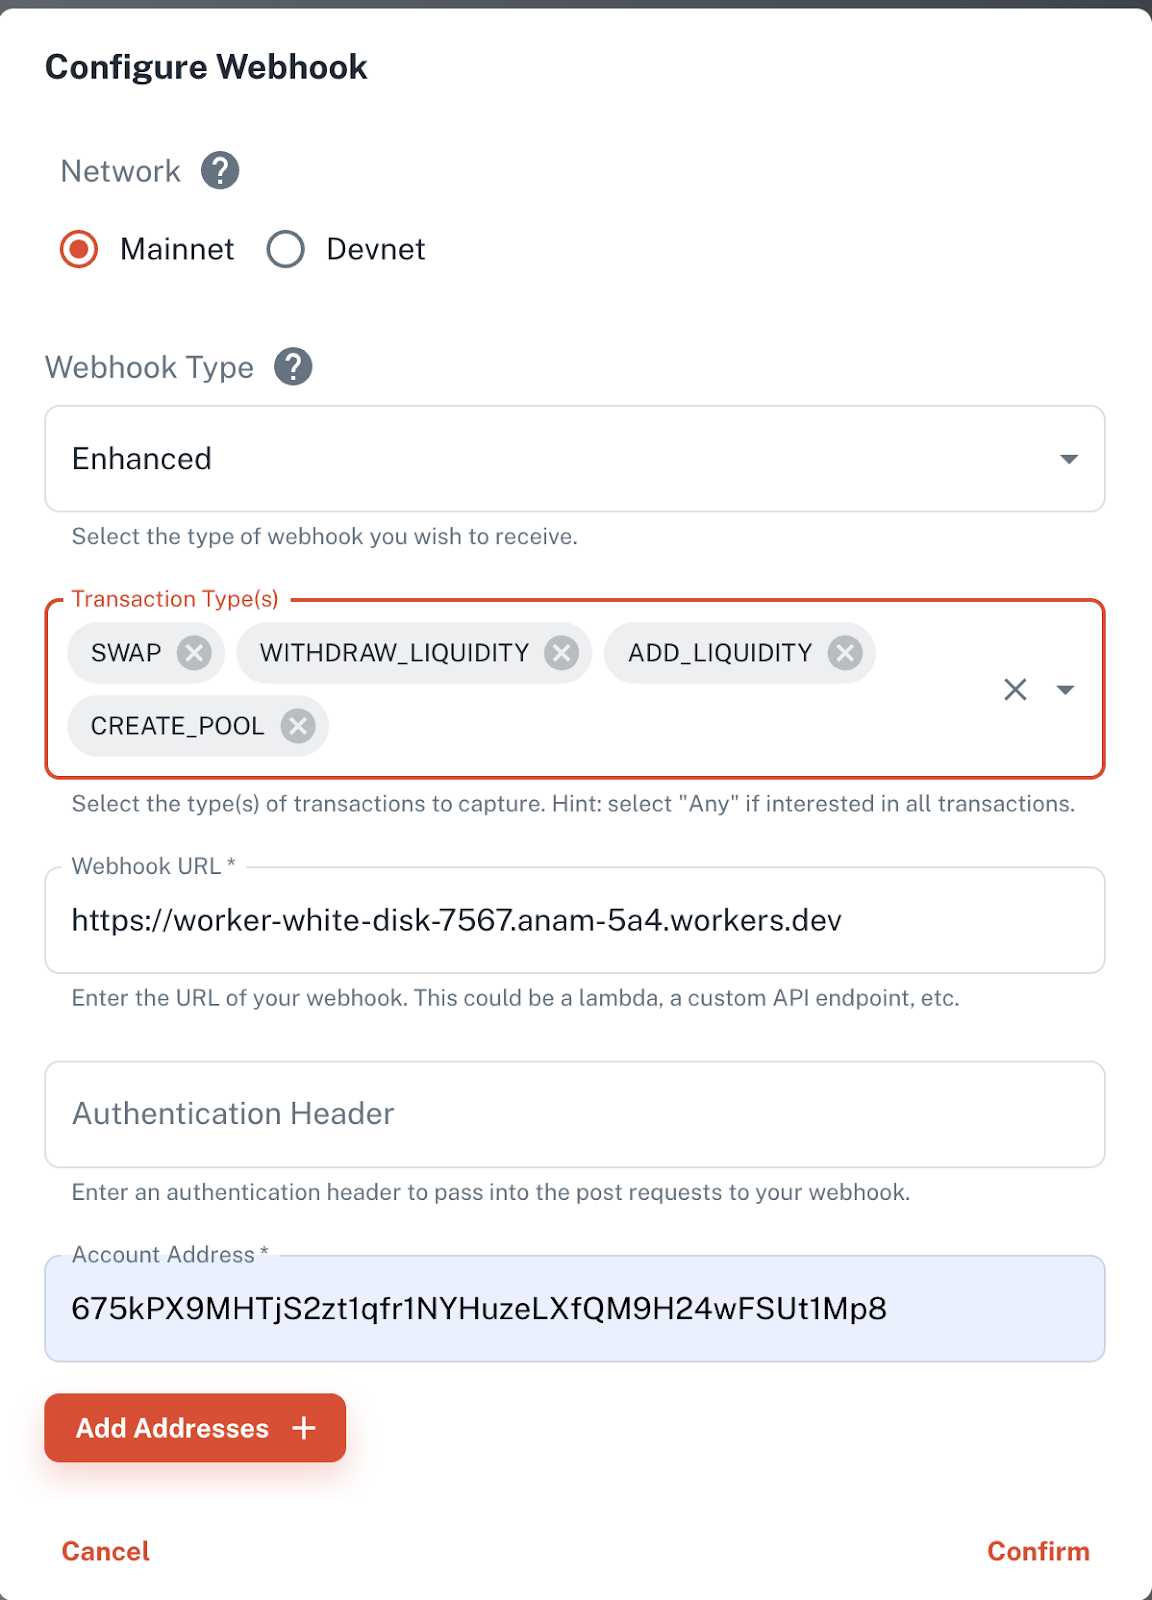
Once you click Confirm, your webhook will notify our Cloudflare worker. The next step is to write the appropriate code to handle the notification.
Handling the Webhook Notification in the Worker
We need to install the Wrangler CLI to add our code to the worker so that it can handle the data correctly when triggered.
Log in to your Cloudflare account to enable Wrangler to deploy your scripts to Cloudflare. Open a command prompt/terminal and enter the following:
wrangler login
When Wrangler automatically opens your browser to display Cloudflare’s consent screen, click the Allow button. This will send an API Token to Wrangler.
Initialize a new project from the Worker created through the Cloudflare Dashboard:
wrangler init --from-dash <worker-name>
Check the Metrics section to find the name of the worker:
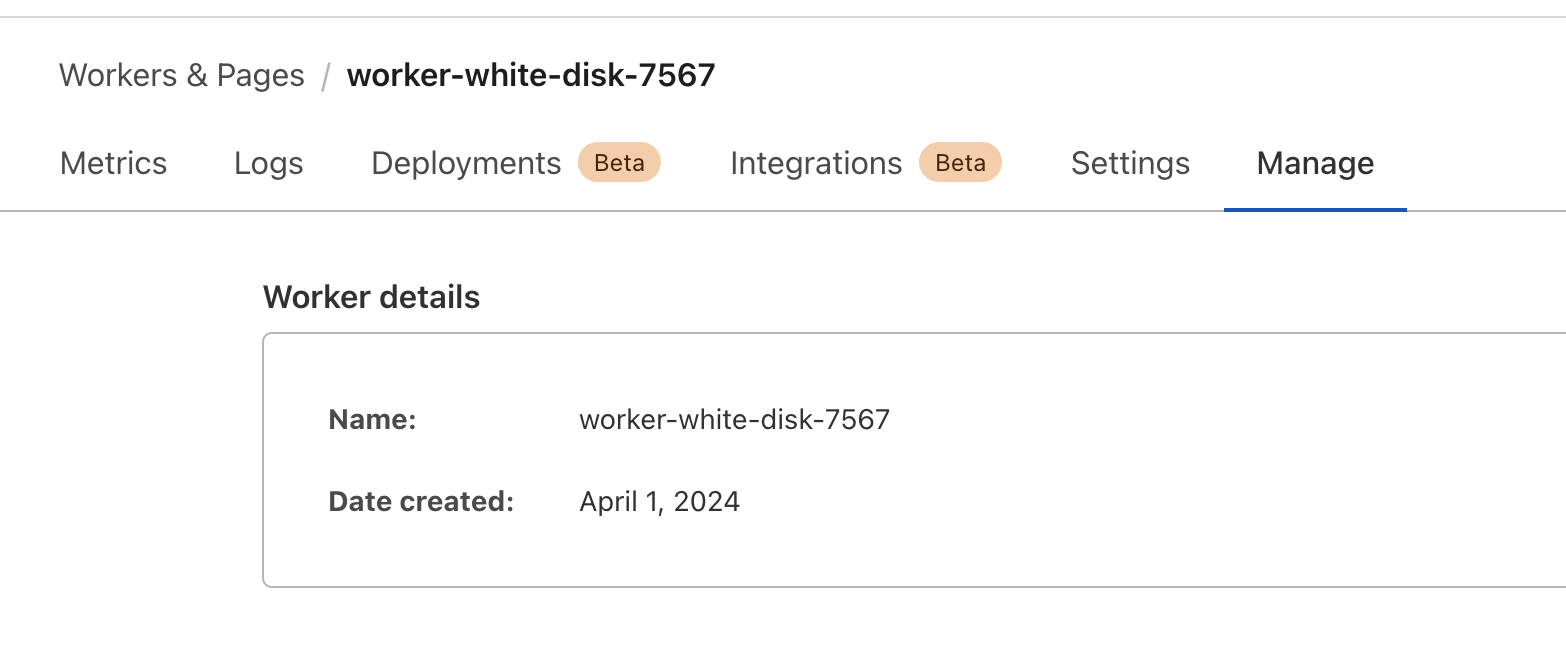
The command above will create a folder containing the worker's configuration and code. Next, replace the code in the file at src/index.js with the code provided below. Be sure to add in your API key. We recommend using the following best practices to conceal your API key.
Now, we’ll use the following code in our worker:
const HELIUS_API_KEY = API_KEY;
const HELIUS_RPC_URL = `https://mainnet.helius-rpc.com/?api-key=${HELIUS_API_KEY}`;

addEventListener('fetch', event => {
    event.respondWith(handleRequest(event.request))
})

async function handleRequest(request) {
    if (request.method === 'POST') {
        const requestBody = await request.json();
        console.log(requestBody[0].description);

        return new Response('Logged POST request body.', { status: 200 });
    } else {
        return new Response('Method not allowed.', { status: 405 });
    }
}
In this code, we are only logging the notification's description. Response notifications have a parsed transaction format. It's important to note that financial data such as price information is not provided. You can use platforms like Jupiter and Birdeye to get financial information.
Deploy your project to Cloudflare’s global network:
wrangler publish
After the code is published successfully, let’s check the logs. Head back to the Cloudflare website and Go to the Logs section:

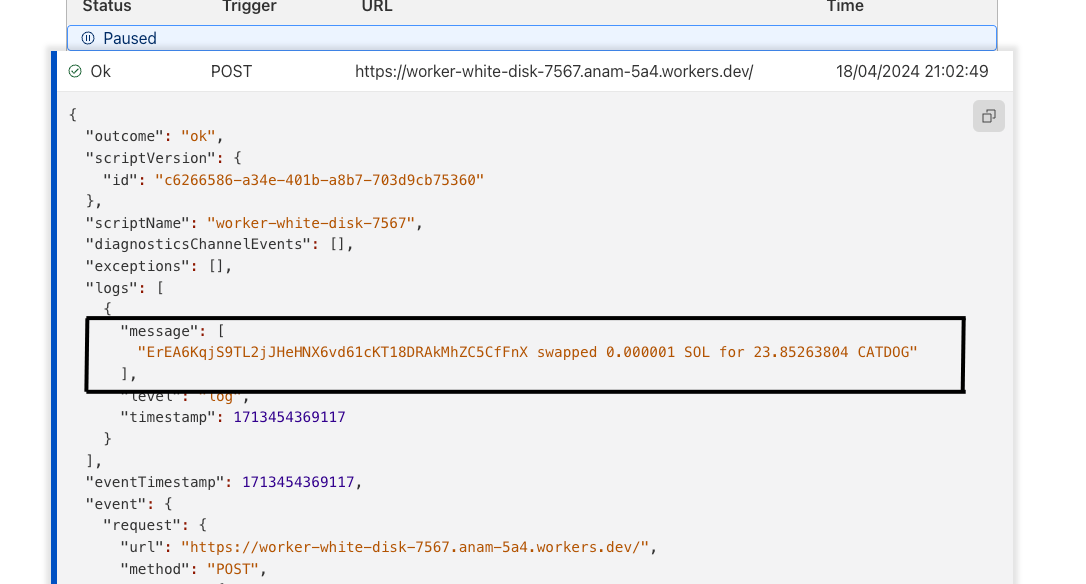
Click on the Begin Log Stream button. Please note there will be a lot of logs due to the large number of transactions being processed by Raydium. Feel free to filter the logs later to find the necessary transaction notifications.
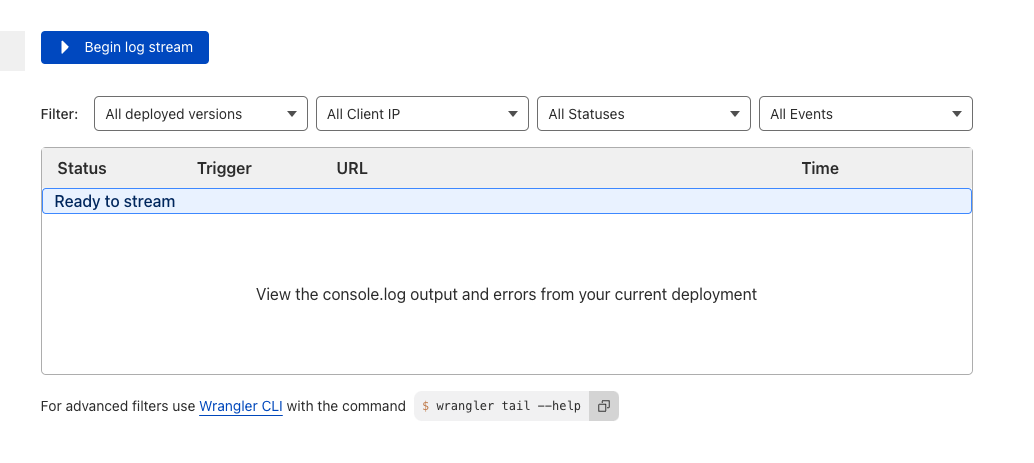
You can view the logged data under "message" by expanding any received log.
Via Websockets
Websockets are a communication protocol that allows real-time data exchange between clients and servers. This differs from traditional methods, where a client sends a request and waits for the server to respond. With websockets, the connection remains open, exchanging data continuously. We will use websockets to monitor the Raydium liquidity pool.
To achieve faster response speeds in our project, we will use the geyser-enhanced transactionSubscribe method, which is available as a beta feature. Please note that this method is only available for paid plans. The Geyser Enhance websockets are faster than the standard RPC websocket methods. To get started, let's create a basic JavaScript project and create a new folder named websocket-test. Then, we need to create a package.json file.
{
    "name": "websocket-test",
    "version": "1.0.0",
    "description": "",
    "main": "index.js",
    "scripts": {
        "test": "echo \"Error: no test specified\" && exit 1",
        "start": "ts-node src/index.js"
    },
    "keywords": [],
    "author": "",
    "license": "ISC",
    "devDependencies": {
        "@types/bn.js": "^5.1.0",
        "ts-node": "^10.7.0",
        "typescript": "^4.6.3"
    },
    "dependencies": {
        "@solana/web3.js": "^1.41.3",
        "dotenv": "^16.0.0"
    }
}
Create a folder named src and add a file called index.js. Copy and paste the following code into the file, replacing <your-api-key> with your own Helius API Key.
const WebSocket = require('ws');

// Function to send a request to the WebSocket server
function sendRequest(ws) {
    const request = {
        jsonrpc: "2.0",
        id: 420,
        method: "transactionSubscribe",
        params: [{
                failed: false,
                accountInclude: ["675kPX9MHTjS2zt1qfr1NYHuzeLXfQM9H24wFSUt1Mp8"]
            },
            {
                commitment: "processed",
                encoding: "base64",
                transactionDetails: "full",
                showRewards: true,
                maxSupportedTransactionVersion: 0
            }
        ]
    };
    ws.send(JSON.stringify(request));
}

function websocketHandler() {
    // Create a WebSocket connection
    let ws = new WebSocket('wss://atlas-mainnet.helius-rpc.com?api-key=<your-api-key>');

    // Define WebSocket event handlers

    ws.on('open', function open() {
        console.log('WebSocket is open');
        sendRequest(ws); // Send a request once the WebSocket is open
    });

    ws.on('message', function incoming(data) {
        const messageStr = data.toString('utf8');
        console.log('Received:', messageStr);
    });

    ws.on('error', function error(err) {
        console.error('WebSocket error:', err);
    });

    ws.on('close', function close() {
        console.log('WebSocket is closed');
        // connection closed, discard old websocket and create a new one in 5s
        ws = null
        setTimeout(startWebsocket, 5000)
    });
}

websocketHandler();
We have added Raydium’s AMM Program Address 675kPX9MHTjS2zt1qfr1NYHuzeLXfQM9H24wFSUt1Mp8 in the accountInclude array parameter of the request. You can add appropriate parameters to get your required data.
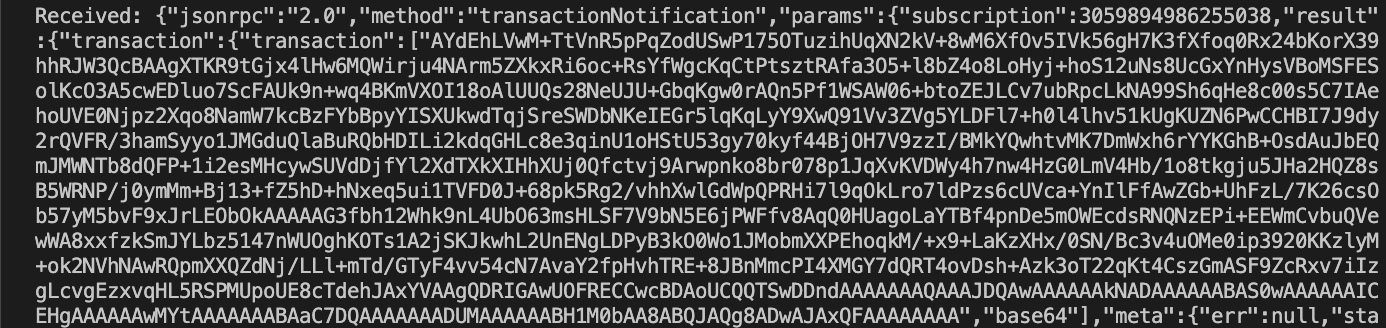
The code connects to a websocket and logs the entire response in the console. The websocket closes after ~5 minutes of inactivity. To prevent this, a reconnection logic is added in the onClose handler.
Run this command in the command prompt/terminal:
npm install && npm start
You will begin to see logs like this appear in the console:
Conclusion
That’s it! Setting up a webhook to monitor a liquidity pool is simple. Alternatively, you can use the geyser-enhanced websocket method for faster response speed. Once you have completed the setup, you can build a suitable frontend to display the data. You can use a dedicated node with a geyser RPC plugin for a dedicated connection with faster speed. If you encounter any issues or require assistance, please do not hesitate to contact us on Discord!
Be sure to enter your email address below so you’ll never miss an update about what’s new on Solana. Ready to dive deeper? Explore the latest articles on the Helius blog and continue your Solana journey, today.
Resources
- Creating a Webhook
- Cloudflare Worker
- Helius Documentation on Websockets
- What are Liquidity Pools by CoinDesk
- Solana Dev 101 - Making a Solana Discord Bot with Webhooks
