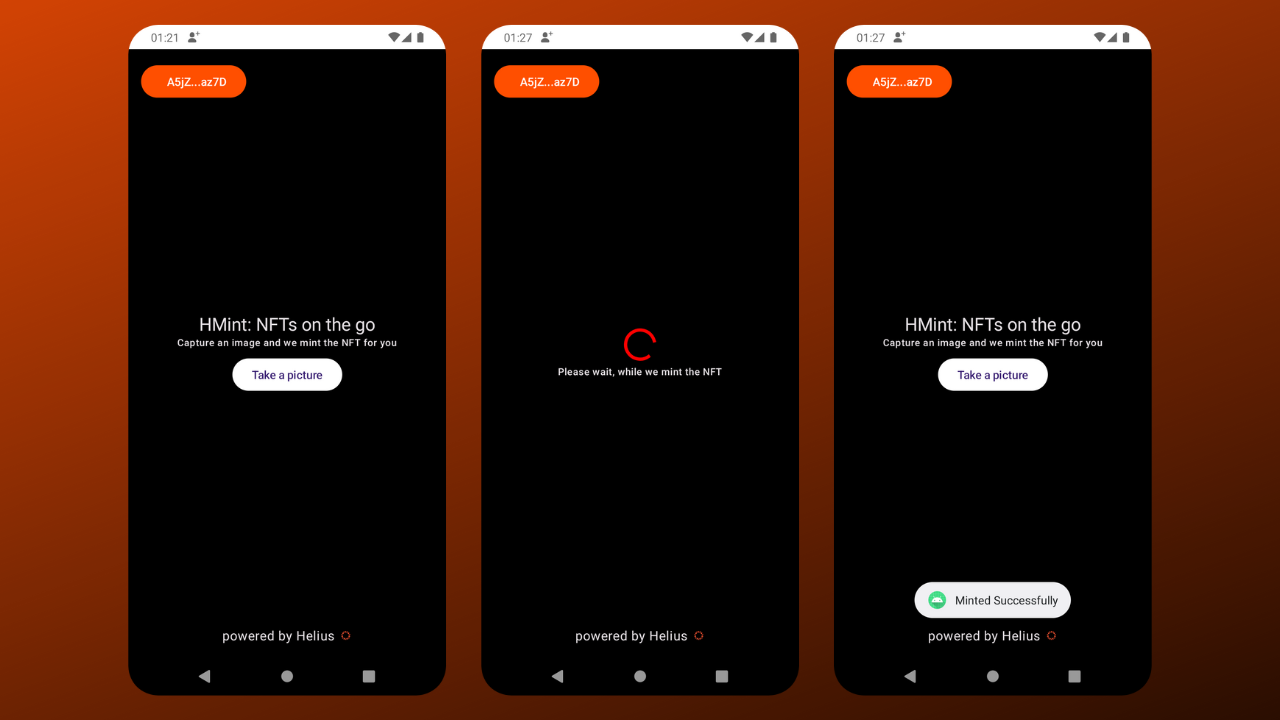
Build a cNFT Minter Mobile App in Under 5 Minutes
What to Expect
This tutorial covers how to build an NFT (Non-fungible Token) minting Android application. The idea is to let users easily capture images and mint compressed NFTs on Solana. To achieve this, we'll use the Helius Mint API. This API makes it faster to mint compressed NFTs and minimizes boilerplate code, saving you a lot of time and planning. Our Android Application will be written in Kotlin and Jetpack Compose.
What are compressed NFTs?
Compressed NFTs (cNFTs) use state compression and concurrent Merkle trees to reduce storage costs. Compressed NFTs are 2,400-24,000x cheaper than their uncompressed counterparts, while still retaining identical structures.
Prerequisites
Before diving into this tutorial, you should have a basic understanding of Android development with Kotlin and familiarity with Solana.
Tools
- Android Studio: Giraffe | Version 2022.3.1
- Emulator or Mobile Device: This will be used to test the application. Ensure an MWA-compatible wallet application is installed (Solfare is recommended).
API Key
To use the Helius Mint API, you'll need an API key. Here's how to obtain one:
- Visit the Helius Developer Portal.
- Create an account using your Solana wallet, Google, or GitHub account.
- Once logged in, follow the prompts to generate an API key.
- Ensure to securely store this key, as it will be used for making API calls throughout this tutorial.
Building the App
Step 1: Project Setup
We've prepared a starter-pack codebase for this project.
To get started, follow these steps:
- Access the starter pack on GitHub.
- Fork the repository and clone it to your local environment.
Once you have the code locally, proceed with the following:
- Open the project in Android Studio.
- Allow Gradle to complete the build process.
- Run the code.
Explore the starter app to familiarize yourself with its features. Notice the wallet connect button integrated into the app. This lets you connect to any Mobile Wallet Adapter (MWA) Compatible Wallet Apps. Mobile Wallet Adapter (MWA) is a protocol specification for connecting mobile dApps to mobile Wallet Apps, enabling communication for Solana transactions and message signing. The Mobile Wallet adapter supports these wallets. Additionally, you'll find the "Take a Picture" button, which currently allows you to capture a picture.
To securely store the Helius API key in the codebase, navigate to the local.properties file and add the API key. This file is specifically designed to contain sensitive information and is ignored by Git, ensuring the confidentiality of your API key.
api_key=<your-api-key>
We'll dive into coding the logic to mint the captured image as a compressed NFT (cNFT).
Step 2: Minting Logic
Our goal is to integrate the "Take a picture" button with the camera functionality. Integrating this button will allow users to capture images and mint them as NFTs. We've provided a starter code to open the camera and capture images. Now, our focus is on creating a function to manage the minting process.
Mint API by Helius
This method mints a compressed NFT. Upon execution, it will pause until the transaction is confirmed, which could take up to 60 seconds during peak network activity. Visit the docs to learn more
Begin by navigating to java/com/example/hmint/MainViewModel.kt and create the mintCNft function within the MainViewModel class:
We'll initiate a coroutine to handle the minting logic within this function. Initially, we'll retrieve the API Key, define the necessary variables, and the requestBody. Later on, you can customize the requestBody to include additional attributes and data as per your requirements:
Subsequently, we'll construct the request and initialize an OkHttpClient:
Before invoking the client, let's define the response in a data class. Create a new package named data and a new file NFTResponse.kt within it to define the structure for the response received from the API call.
Then, within the MainViewModel class, augment the WalletViewState data class with an additional value for mintResponse. We'll update this value when we receive a response:
Returning to our mintCNft function, utilizing the client, we'll execute the request and handle any failures or responses accordingly. Upon receiving a response, we'll use Gson to parse the data into the NFTMintResponse data class we previously created, subsequently updating the value of mintResponse accordingly:
In our UI, we aim to provide feedback to the user regarding the outcome of the minting function. Hence, navigate to java/com/example/hmint/composables/MintButton.kt, which contains the composable, holding both the UI code and logic for image capture. Within MintButton, where we've declared cameraLauncher, we'll call our mintCNft function. Additionally, include code to display a Toast upon updating mintResponse.
Step 3: Run the App
We've wrapped up the coding phase, so let's run the application. Begin by connecting your wallet, then capture an image, and watch as the app seamlessly mints the NFT for you.

Conclusion
Well done! You've successfully developed an Android application that empowers users to mint compressed NFTs. Thanks to the Helius Mint API, minting cNFTs has never been simpler, requiring just a single call.
What's next?
There's plenty more to explore and enhance within this app. One such enhancement is the integration of the DAS API. The Digital Asset Standard (DAS) API is an open-source specification and system providing a unified interface for interacting with digital assets, including tokens and NFTs. It supports various asset types, including fungible tokens, standard NFTs, and compressed NFTs. Using the API you can fetch all the minted compressed NFTs and display them within your application, offering users a comprehensive overview of their digital assets.
Relevant Resources
To deepen your expertise in Android development with Jetpack Compose, delve into Solana blockchain integration and API interaction, and explore the following resources:
- Jetpack Compose
- Solana Mobile Adapter in Kotlin
- Dependency injection with Hilt
- OkHttpClient in Android
- Compression on Solana
- Helius MINT API
If you need any help or support, don't hesitate to contact us on Discord. The complete codebase is available on GitHub for further reference.

